Installation
Step by Step GuidesTechno Guides
Laying Membrane Edge Trims Gutter Trim External Edge Corner Wall Trim Flashing Under Tiles Onto Tiles Wall Trim Flashing External Corner (Skylight / Upstand) Internal Corner Pipeseal Seam / Join Rainwater Outlet Horizontal Rainwater OutletLineflex Guides
Lineflex Heat Weld Laying Lineflex Laying Lineflex With Spray Adhesive Laying Lineflex With Mechanical Fixings Edge Trim Gutter Trim External Edge Corner Under Tiles Onto Tiles External Corner Internal Corner Pipe Seal Felt Join Butt Join Rainwater Outlet Horizontal Rainwater Outlet
Horizontal Rainwater Outlet Download PDF
Step by step guide on installing a horizontal rainwater outlet to your next rubber roofing project.
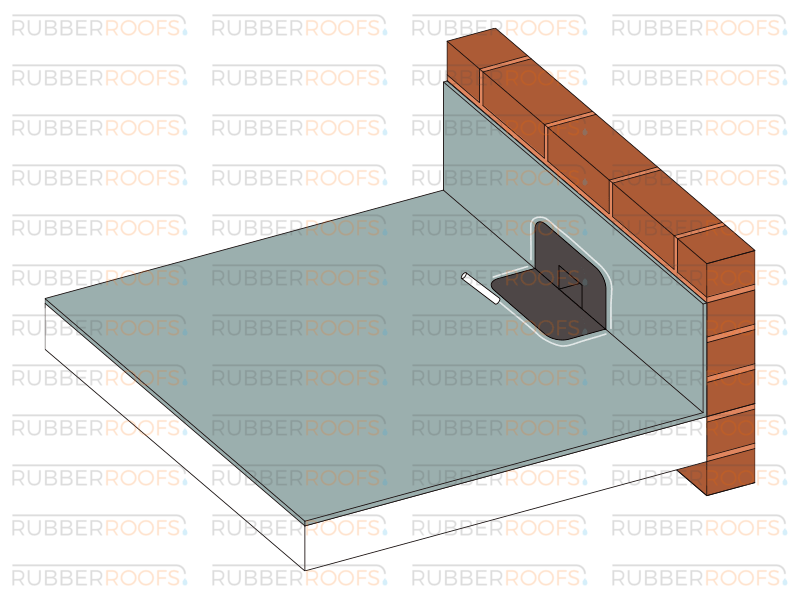
Step 1
Place the outlet through the wall and mark around it using a crayon or similar, allowing an additional 1cm around the perimeter.
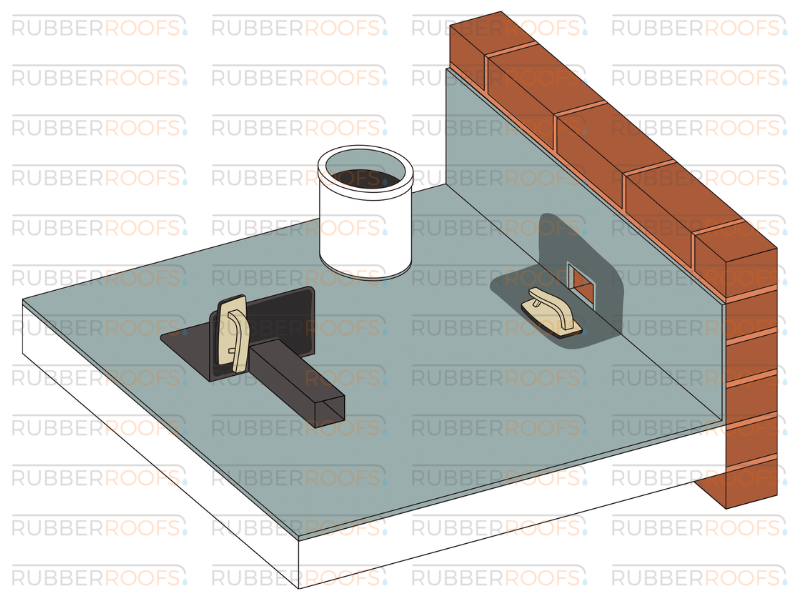
Step 2
Stir thoroughly and prime the underside of the outlet and the marked area on the rubber using a Scrubber Pad and handle. Allow both surfaces to dry.

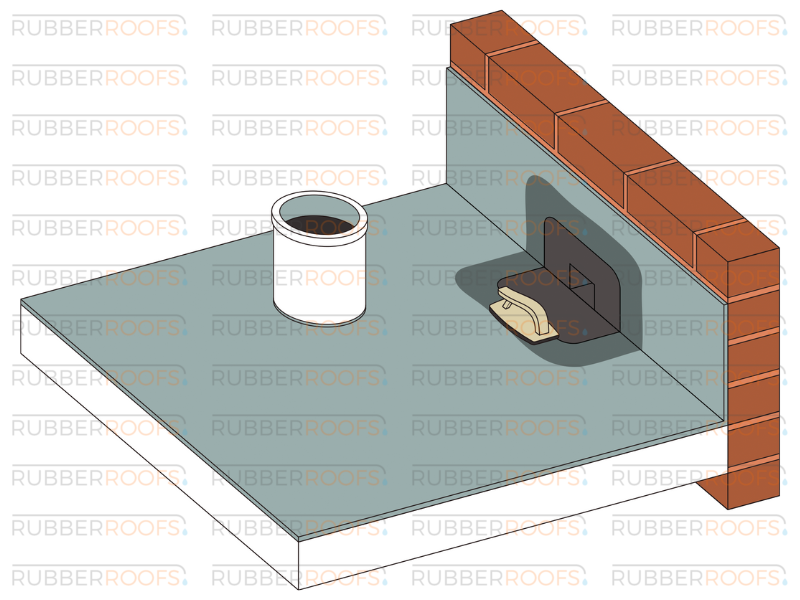
Step 3
Mate the outlet to the rubber and seal in place using a penny and silicone roller.

Step 4
Round the corners of the 18" Flashing Tape (Horizontal flashing kit) with scissors and neatly position over outlet. Mark the perimeter with crayon.
Step 5
Prime the rubber and outlet using the scrubber pad and handle and extend primer beyond the crayon line by 2cm and into the mouth of the outlet by 100mm.
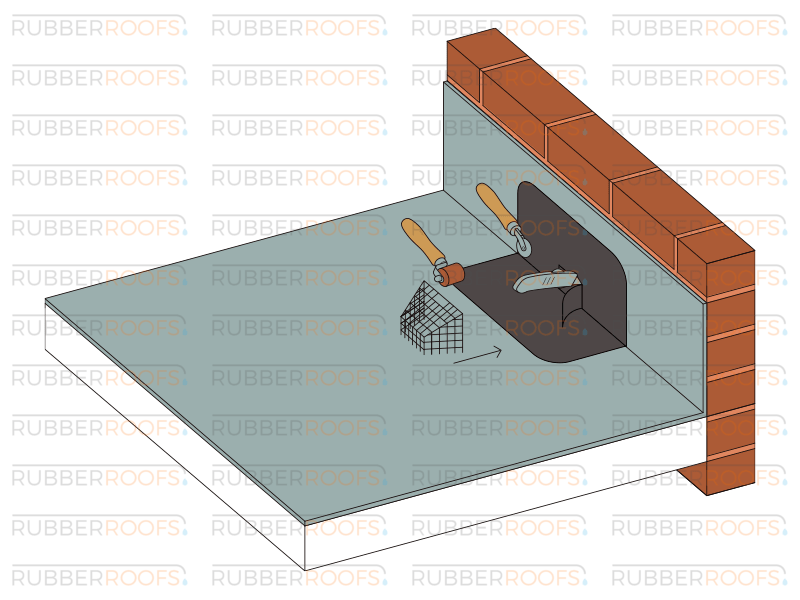
Step 6
Once touch dry, working from the bottom, position the 18" Flashing Tape and carefully remove the backing paper. Ensure it is tightly sealed into the corners and use a penny and silicone roller. Carefully cut the sides and top at the aperture and allow flap to drop into the primed outlet.