Installation
Step by Step GuidesTechno Guides
Laying Membrane Edge Trims Gutter Trim External Edge Corner Wall Trim Flashing Under Tiles Onto Tiles Wall Trim Flashing External Corner (Skylight / Upstand) Internal Corner Pipeseal Seam / Join Rainwater Outlet Horizontal Rainwater OutletLineflex Guides
Lineflex Heat Weld Laying Lineflex Laying Lineflex With Spray Adhesive Laying Lineflex With Mechanical Fixings Edge Trim Gutter Trim External Edge Corner Under Tiles Onto Tiles External Corner Internal Corner Pipe Seal Felt Join Butt Join Rainwater Outlet Horizontal Rainwater Outlet
Wall Trim Flashing Download PDF
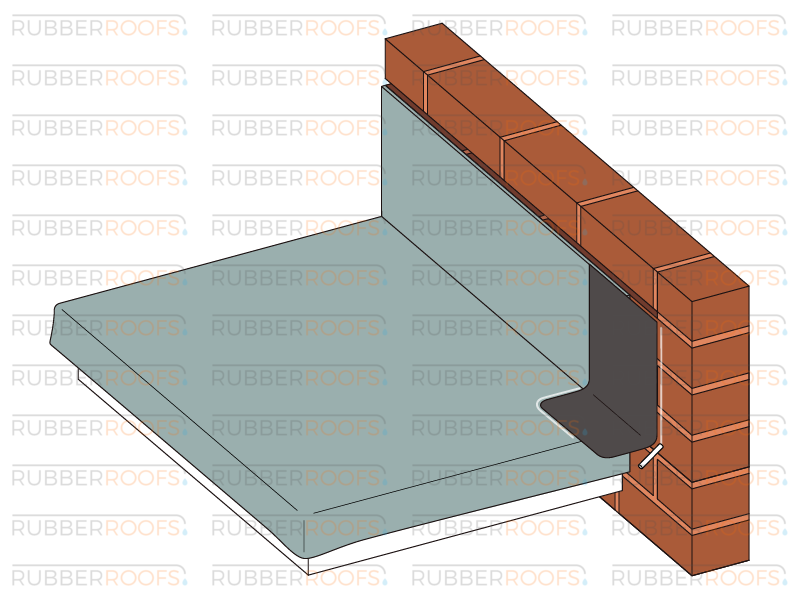
A guide to installing a wall trim flashing.
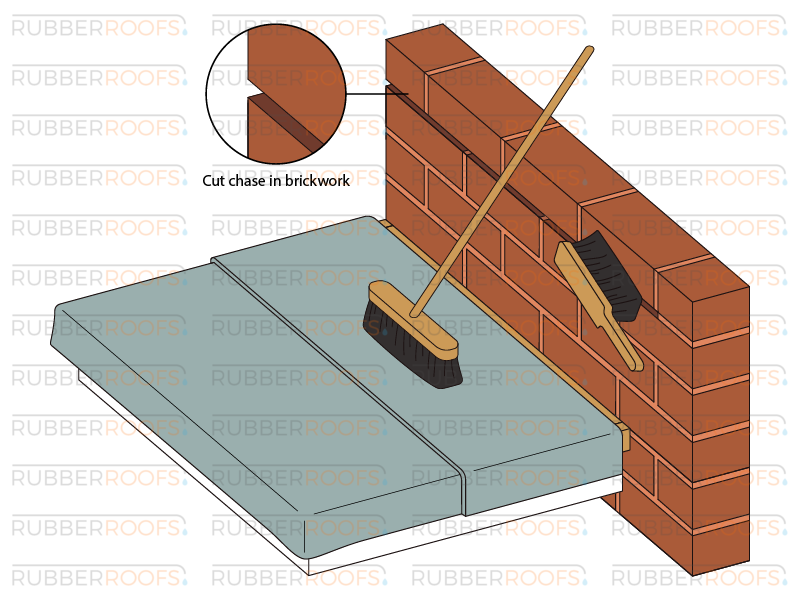
Step 1
Thoroughly clean the wall, chase and rubber.
Step 2
Apply a thin coat of contact adhesive to the rubber and the wall.
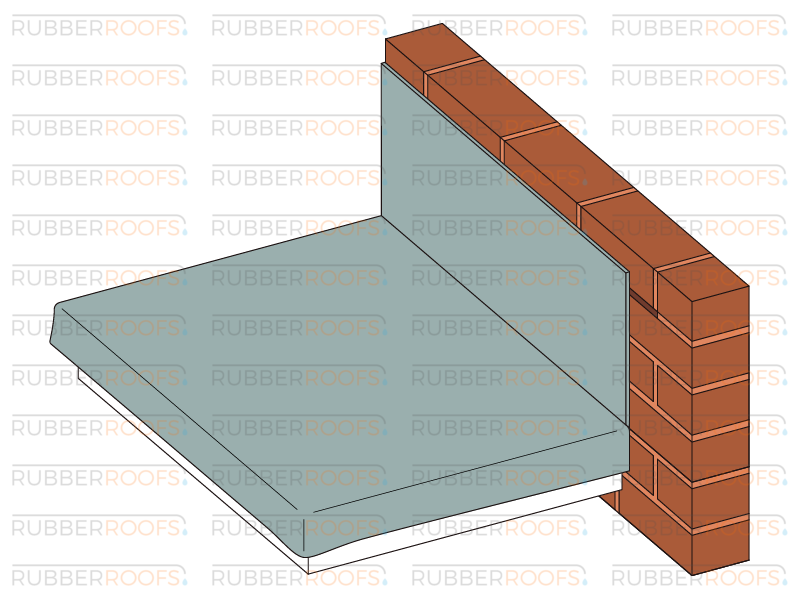
Step 3
Once touch dry, starting at the bottom, carefully mate the surfaces together. Smooth by hand and silicone roller.
Step 4
Trim membrane.
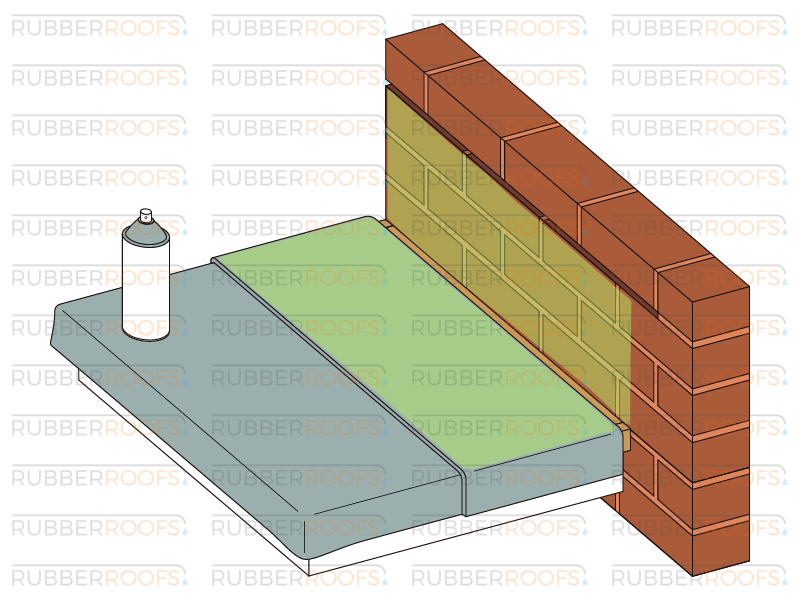
Step 5
Position a piece of 9” Flashing Tape or a Detail Kit as shown and mark the perimeter, allowing an extra 1cm.
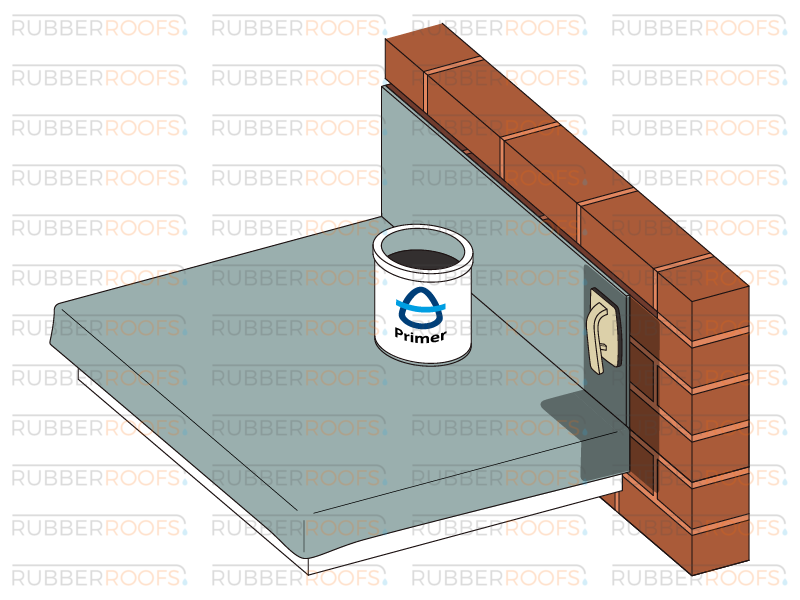
Step 6
Apply Primer to the marked area using a Scrubber Pad and handle, allow primer to dry.
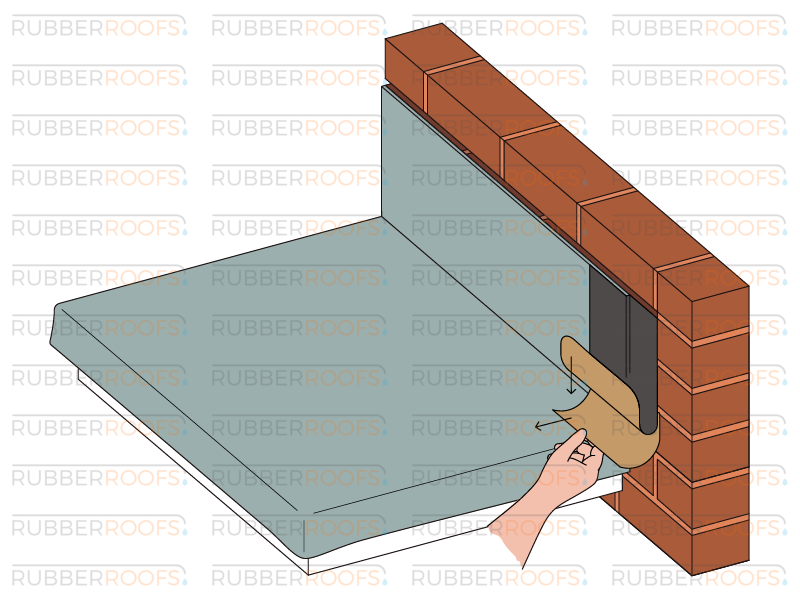
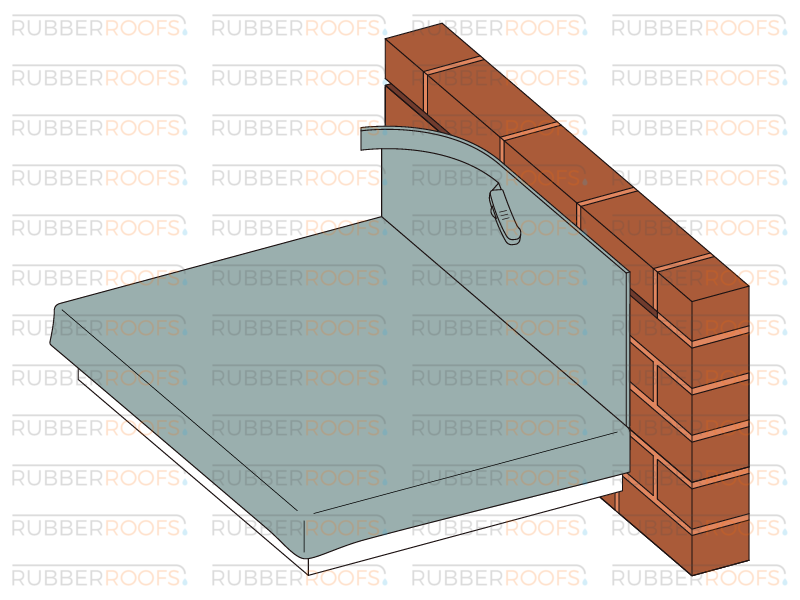
Step 7
Peel back a section of backing paper and starting from the top, slowly work downwards as shown.

Step 8
Apply a gentle heat source to the corner if needed.

Step 9
Thoroughly roller with Silicone and Penny Rollers.
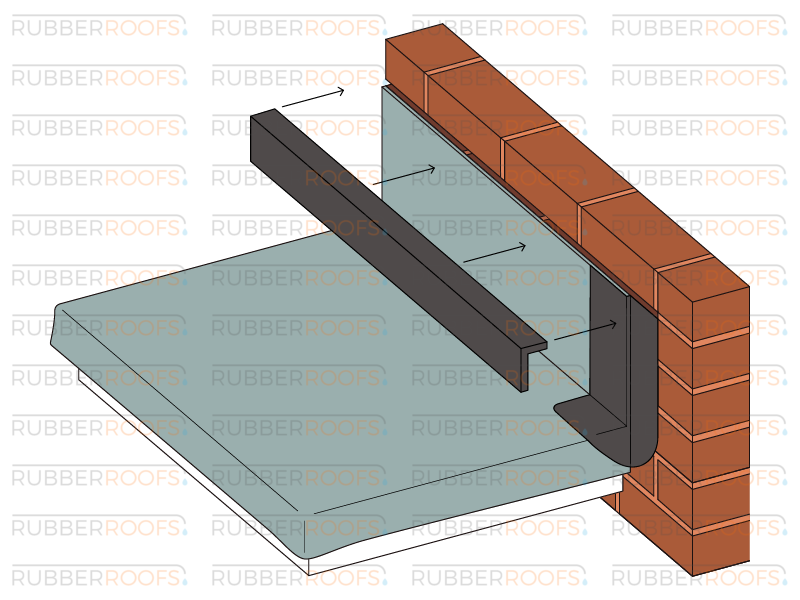
Step 10
Insert wall trim into chase and secure at 600mm centres with the supplied fixings. Raw plugs are not needed if a 5.5mm masonry drill bit is used.
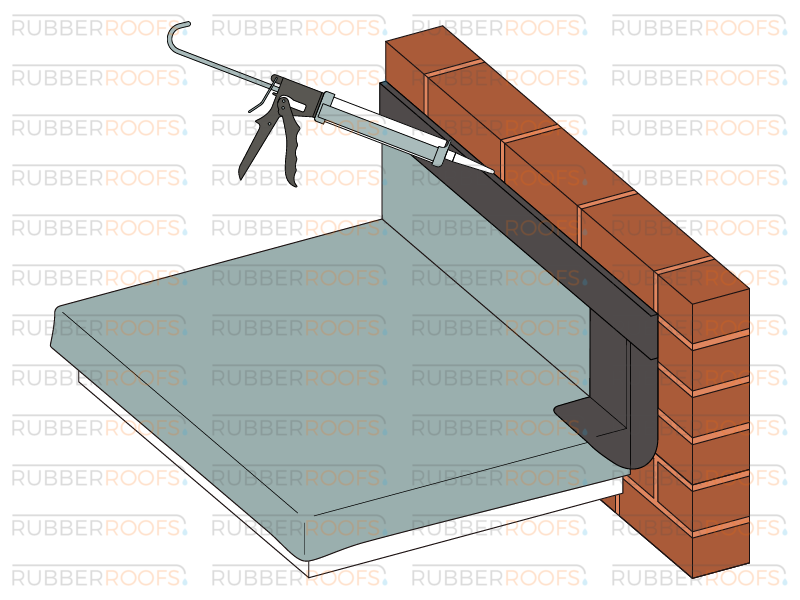
Step 11
Thoroughly seal chase with Wall Mastic.