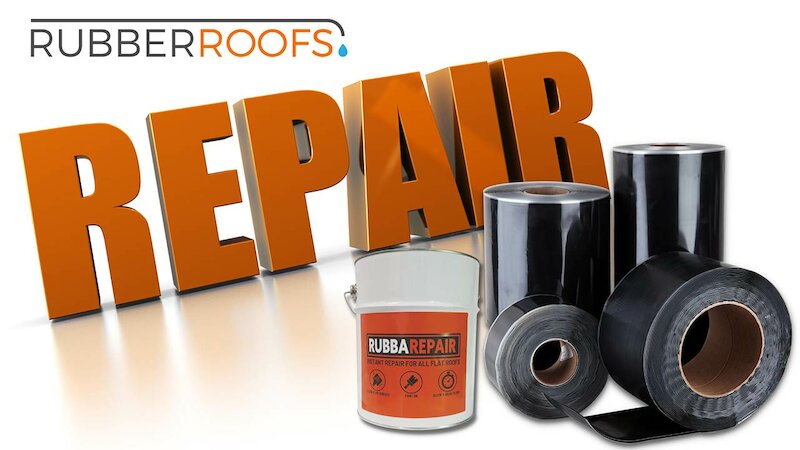
EPDM Repair Kits
It’s no lie that EPDM is a fantastic system to use on flat roofs; it is highly durable, exceptionally resistant to both UV and weathering and has a lifespan of over 50 years (with EPDM installed on roofs in the 1960s still going strong today). However, owing to their placement, they are, like most outdoor areas, susceptible to damage from debris.
It is all too common that loose tiles or heavy debris hit flat roofs, and although there is no fear of the EPDM lifting in the wind, impacts can sometimes be unavoidable.
EPDM Roof Damage
Although it can be worrying if you believe your EPDM roof is damaged, it is important first to evaluate the extent of the damage the roof has suffered.
In normal scenarios, damage from debris usually only results in small punctures or tears which are easily repaired using an EPDM repair kit (either bought as a bundle or the items sold separately).
EPDM Repair Kits
While we do not directly sell EPDM repair kits, the items which are found in a standard kit are all available from us, and we have included links below to ensure you know exactly what to purchase in the event your roof has suffered damage.
What Does an EPDM Repair Kit Include?
A standard EPDM repair kit comprises the following items:
We also recommend the following:
How To Use An EPDM Repair Kit
Repairing a puncture or tear with the items found in an EPDM repair kit is a straightforward process, however, we recommend that you follow these steps carefully, and do not rush through the process and ensure that the area is prepared and that the patch is fitted correctly.
Repairing Punctures Or Tears In An EPDM Roof
-
To begin your rubber roof repair, clean the area and ensure there are no debris, dirt or other objects that may be caught underneath the patch once applied.
-
Dry-fit the flashing tape over the affected area, carefully marking the affected area and ensuring full coverage.
-
Using the scrubber pad, apply EPDM primer to the marked area, ensuring coverage on the edges of the marked area to avoid any lifting around the edges of the flashing.
-
Allow the EPDM primer to dry (see the label on the primer for exact drying times based on temperature).
-
Apply the flashing tape to the primed area
-
Using a seam roller, apply pressure to the area, making sure that the tape has sufficient adhesion and that no bubbles are present.
Avoiding Further Damage to Your EPDM Roof
Sometimes damage from debris is unavailable, however, there are steps which can be taken to avoid further damage, such as; keeping the roof clean and free from debris, eliminating threats (e.g. loose roof tiles which could land on or hit the EPDM roof), and limiting the access to the roof.
More articles from our blog…
The Future of EPDM Rubber Roofing Technology