Rainwater Outlets Installation Process

Rainwater outlets for an EPDM roof help prevent any rain water from seeping into the membrane, damaging the roof and causing leaks. These ensure a watertight seal on roof vents and drains. They have multiple benefits including excellent longevity and durability, surviving against the harshest weather conditions throughout the year. Used to connect the EPDM to water drains, the outlet has a smooth flange to improve adhesion to the EPDM membrane. In this blog post, we are going to show you how to install your rainwater outlet with ease.
Step 1
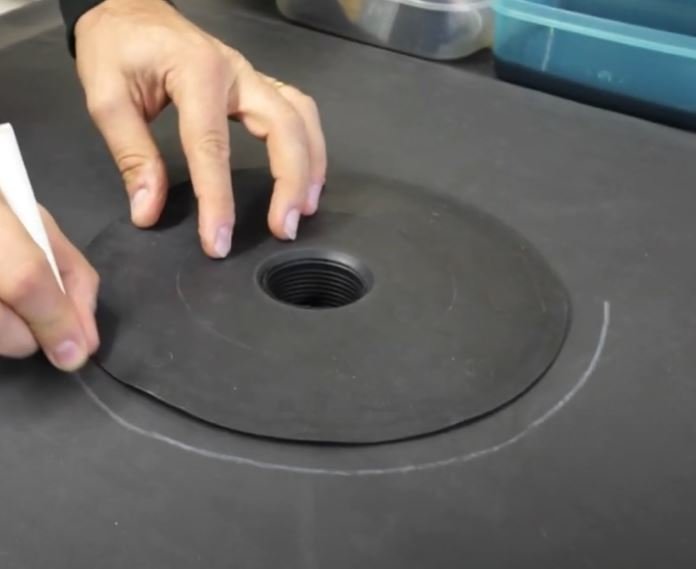
Place the rainwater outlet through the pre-cut hole and mark around it using a crayon or similar. This allows you to ensure the drain outlet you have purchased will fit snugly into the surface.
Step 2
For step 2, you will need to prime the underside of the rainwater outlet as well as 1cm beyond the marked area on the rubber. This can be done by using a quick scrubber pad and handle. Ensure both surfaces are touch dry before continuing.
Step 3
For step 3, you will need your silicone roller that you can find here. Mate the two surfaces together and compress, using your silicone roller. This will ensure a smooth compression without any lumps and bumps.
Step 4
For step 4, you will need to round the corners of the 12” Formflash (Rainwater flashing kit) with scissors. You can then neatly position it over the outlet. Make sure to mark the perimeter with crayon in preparation for step 5’s primer.
Step 5
For the 5th step, make sure to prime the rubber and outlet using the quick scrubber pad and handle. You can then extend the primer beyond the crayon line by 2cm. Be careful not to go under or over the 2cm limit.
Step 6
Once touch-dry, neatly position the 12" Formflash and carefully remove the backing paper. Roller the formflash firmly in place and use a sharp blade to carefully cut out the hole.
For more information, or to shop any of our products including rainwater drain outlets, silicone rollers and more to aid in the completion of your rainwater drain outlet installation at our website here.


